One of my recent clients had a very interesting situation of memory pressure, which we detected during the Comprehensive Database Performance Health Check. In most of the cases, my clients have either CPU pressure issue or the disk/IO issue. However, in this particular case, we had memory issue and after careful investigation, we found the troublemaker as a Lock Pages in Memory settings.

Resource Troubles
While the investigation of the system, I realized that the plan cache duration of various queries was often removed from the system. This was not good as it increased the work for the CPU where it has to constant recompile new plans. Eventually, this also leads to disk IO issue as data was not staying longer in the cache and it had to be pulled from the disk.
The typical question which I asked my client was – what changed since last time when everything was fine and their answer was Windows OS. This was a very strange issue for my client as they had no past history of the trouble and everything just started suddenly once they migrated from the older Windows OS to the newer Windows OS.
Well their answer to changing the OS made thing simple for me. Most of the people often forget to Enable Lock Pages in Memory or LPIM when they change the windows OS.
Lock Pages in Memory
When OS is running low on the memory, it starts clearing the cache of various application which is installed on the server. During the process, Windows also clears the plan cache for SQL Server and releases the memory back to the OS. However, there are some cases, the memory is released back to OS even though there is no memory pressure. In such a scenario we should Enable Lock Pages in Memory (LPIM).
Let us learn how we can enable the lock pages in memory.
To enable the lock pages in memory option
- First, find out which user account is running SQL Server. In my case, it was a Local System. You can do that from the services.

- Next, go to the Start menu, click Run. In the Open box, type gpedit.msc.
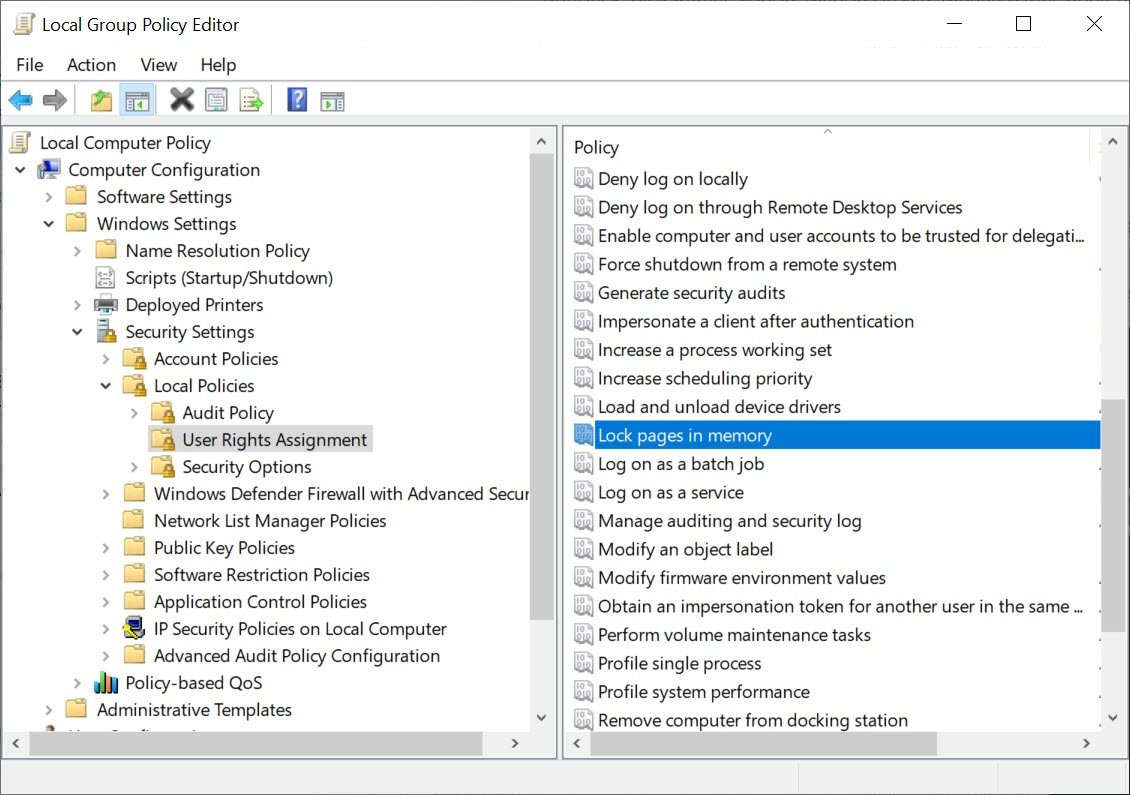
- On the Local Group Policy Editor console, expand Computer Configuration, expand Windows Settings, Expand Security Settings, and then expand Local Policies and select the User Rights Assignment folder.
- Double-click Lock pages in memory or right-click and go to properties

- In the Local Security Setting – Lock pages in the memory dialog box, click Add User or Group and here add your user account which is running SQL Server.

- Restart the SQL Server Services (It is mandatory)
After restarting the SQL Server services, we were able to move forward with normal performance for my clients.
Reference: Pinal Dave (https://blog.sqlauthority.com)


